Monday, June 24, 2013

Grilled Pizza!

You asked for it, so here it is. Grilled Pizza! This is a lot of fun and it takes a little practice. Sam and I first made grilled pizza at least 15 years ago. We experimented a bit and loved it from the start, with its crispy crust and wonderful flavor. In the beginning it seemed like a lot of work, but the more we made it the easier it got to be. We have grilled pizza on our gas grill, a charcoal grill and over a wood fire while we were camping. We were always going to try making it in our wood burning stove in the sunroom, but that remained a dream. Enough back story, here we go.


The Crust

3/4 cup warm water (105-115 degrees)
1 1/4 tsp. yeast
1 tsp. sugar
1/2 tsp. salt
1 3/4 cup all purpose flour

Stir yeast and sugar into warm water. Let sit for about 5 minutes or until foamy. Add flour and salt and stir into stiff dough. Add a bit more flour if necessary to make a stiff dough.

Turn onto floured counter and knead till dough is a smooth elastic ball. Put dough into a well oiled bowl and turn over to oil the top. Cover and let rise for at least 20 minutes.  

This is enough dough for 2 small grilled pizzas or 1 large pizza baked on a pan. 


Get Yourself ORGANIZED

While the dough is rising you will have time to get everything organized and ready. If you are using charcoal, get it started now. If using gas, you can hold off for a bit. Cut your toppings. I like to use lots of veggies and I cut them small. I don't usually use meat as this pizza is best kept light on the grill. I have used sausage and pepperoni, but use sparingly and cut into small pieces. Open the pizza sauce can and have it ready with a spoon, put your cheese in a bowl, easier to get at than in the bag. You will also need
  • a spatula and maybe tongs
  • a wash cloth to wipe your oily hands
  • another pizza pan or cookie sheet for your cooked pizza
  • a pizza cutter or scissors to cut
You can let the dough rise until it is double in size, but you don't have to wait that long. Wait at least 20 minutes. You want the gluten to have time to relax, so the dough is more workable. 

I like to put all my toppings on a plate, with the peppers in one pile, the red onions in another pile, the ribbons of spinach in another pile, the olives in another and so on. You get the idea. If they are all on one plate (or two) it is easier to manage to apply quickly. I have a big tray that holds my plate of toppings, my bowl of cheese, the can of sauce, etc. You want it all handy to the grill. Once the dough is ready and you have things set up it is time to flatten HALF of the dough onto the sprayed pizza pan. 

Remember, this is only half the dough and it will not fill the pizza pan.

Ready To Grill!

Your grill should be heated but not hot! I turn my dials just below half way and have the heat just under 300 at the lowest and up to 375. Anywhere in that range works, but if you have the grill hotter than that the pizza cooks too fast. So don't. If using charcoal, make sure the coals are well burned and completely gray. Spread them out well, so the fire is not too hot.

  
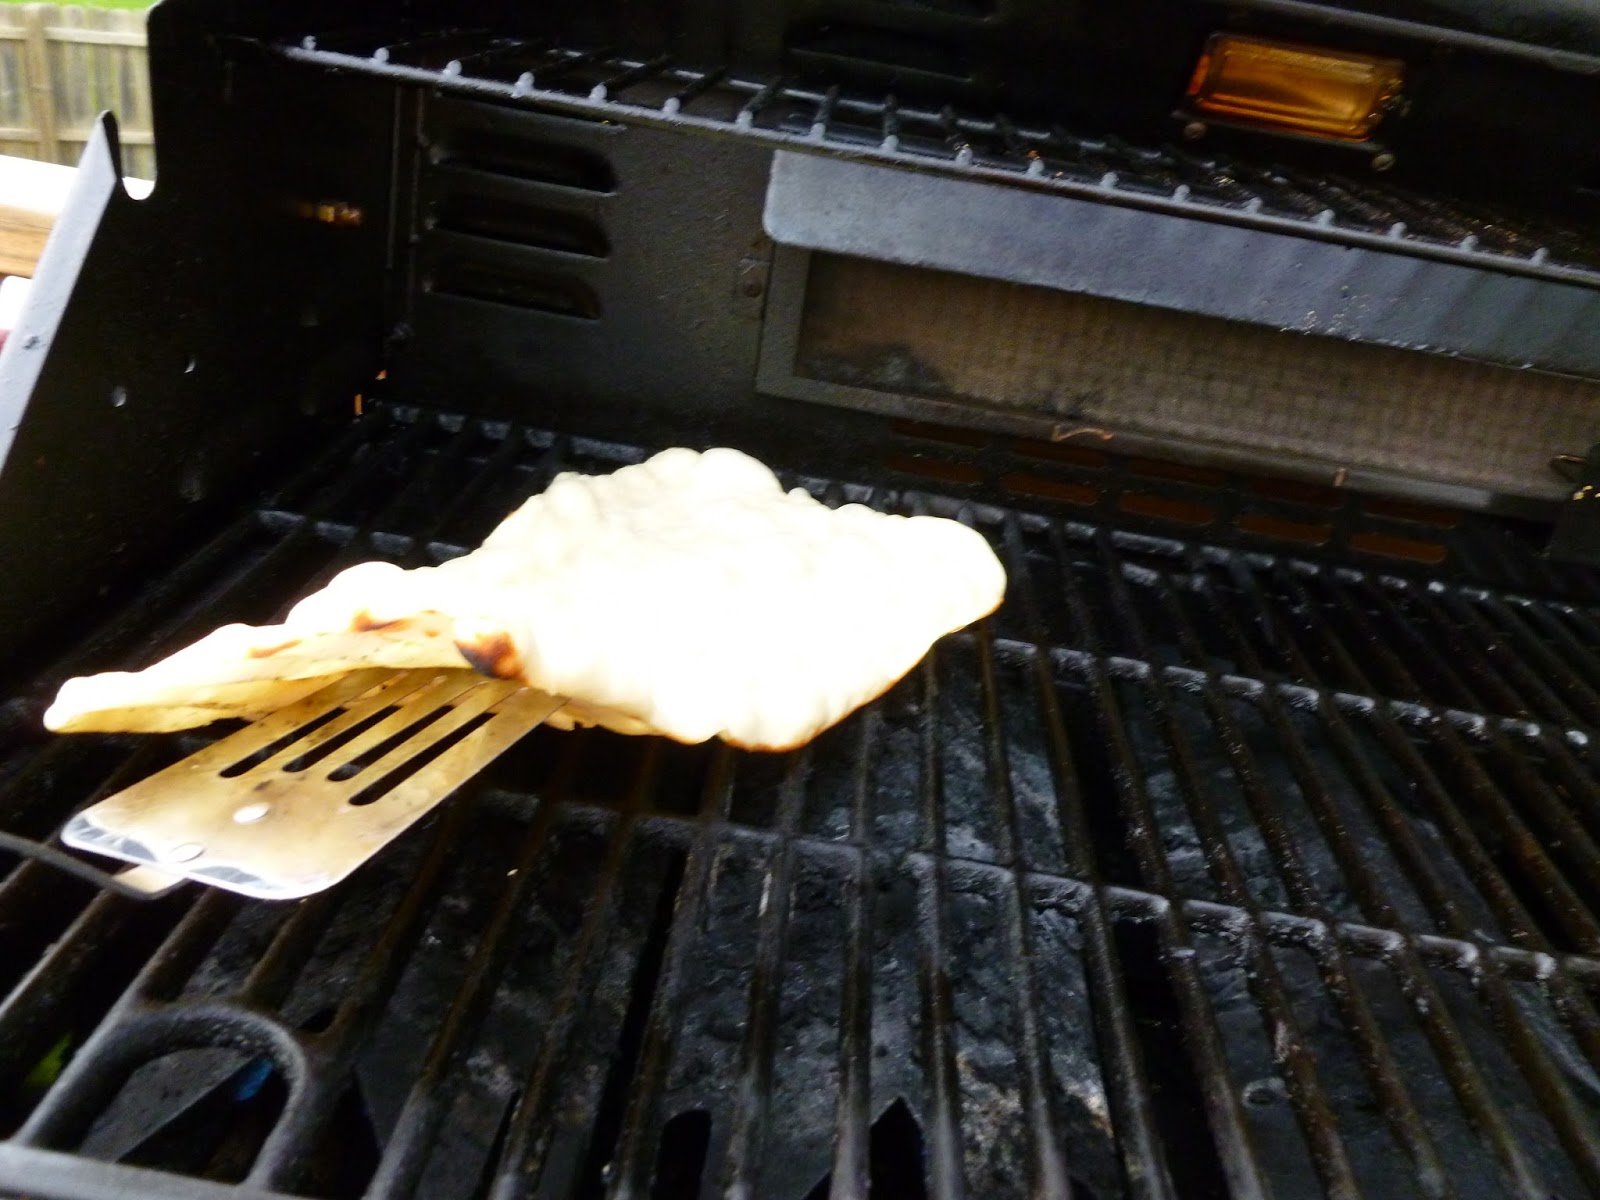
Now take a deep breath, get the pan of dough as close to the grill as possible (have someone else hold it), grab the dough with both hands and flop it directly onto the grill grate. Yes, you read that right. No, it will no longer be in that beautiful round shape. It is ok! Don't sweat it. As long as it is relatively flat it is perfect!

This looked sort of round on the pan,
but by the time it hits the grill it is a bit stretched out!
Wipe off your oily hands, wipe the sweat off your brow, take a swig of whatever you are drinking and high five your good buddy standing by! You did it! Give it a few minutes, then peek underneath. 


Soon it will be a firm, half baked pizza crust. When it is lightly browned use your tongs, a spatula or your bare hands and flip it over.

Starting to look good, isn't it?
Here's where the organization pays off. You need to work quickly. 

  • spread on the sauce
  • add the veggies
  • sprinkle the cheese
  • close up the grill and let it bake

Still needs a few more veggies and some cheese,
 but the bottom is baking, so work quickly.
Once pizza number one is cheesed and is baking, flatten the other half of the dough and add it to the grill. About the time one pizza is done the second can be flipped and finished. 

No two pizzas are alike.

Once the cheese is bubbly and the bottom is browned you can move it to the pizza pan, cut it, and eat it!


Kick Back and Enjoy!

Time to eat! Bring out some good summer foods and whatever beverages you like. Sit around the table, inside or out. Enjoy this delicious food with people you love. What a wonderful world!


You can experiment with some delicious flavor combinations. I made a new one the other night. I skipped the sauce and brushed on olive oil instead. I added chopped sundried tomatoes, black olives, red onions, fresh basil, and a little garlic, then feta and mozzarella. Oh, baby! That was yummy. We ate it first and called it appetizer pizza. 

I have some ideas for dessert pizza, too, but I haven't yet tried them. How about a little cream cheese and some strawberries and peaches?? I will let you know soon.

In the meantime, have fun and play with your food!  

Monday, June 10, 2013

Rhubarb Cake

One of the delights of retirement is enjoying the wonders of springtime. While I was teaching, the month of May was always so hectic that I missed some great things. Some years the lilacs bloomed and the asparagus went to seed before I even realized I had missed it! This year I have missed none of it!

I have used the asparagus and the rhubarb more than any other year. Sam would have loved it. 

Earlier this year I went on a hunt for a rhubarb cake recipe and found one that had wonderful possibilities. After doing some fine tuning and tweaking I was ready to serve it to guests. 

And Here It Is . . .


And Here's The Recipe . . .

Rhubarb Cake

for topping:
3/4 c. sugar
1/4 c. all-purpose flour
1/4 c. cold butter

for cake:
1 cup sugar
1 tsp. baking soda
1/2 tsp. salt
2 c. all-purpose flour
2 eggs, beaten
1 c. sour cream
3 c. rhubarb


Preheat oven to 350 degrees and grease and flour a 9" x 13" pan.

Prepare topping by mixing flour and sugar in a small bowl. Cut the cold butter into 6-8 pieces and mix into the flour and sugar mixture with your fingers. Rub the butter between thumb and fingers. Work the sugar/flour mixture into butter until it is a crumbly mixture. Set aside.

Sift the dry ingredients into a large mixing bowl. Beat the eggs in a smaller bowl and mix in the sour cream. Add the egg mixture to the dry ingredients. Stir together gently and when nearly combined add rhubarb and stir to combine. Spread into prepared pan. Sprinkle on the topping and bake in center of oven for 45 minutes or until a toothpick inserted into the center of the cake comes out clean. 

Cool on cooling rack. Serve slightly warm or cool. 

And To Make It Even Better . . .


Serve it with some ice cream! I found some Strawberry-Rhubarb ice cream that finishes this off perfectly. I think vanilla would be mighty tasty, but if you can find the Strawberry-Rhubarb, you won't be sorry. You will likely be scraping every little crumb and drop out of your dish! 

I have been tempted to add some cinnamon to the topping, but it is so good this way that I haven't done it. Maybe, next time.

I hope you enjoy this little taste of springtime as much as I do. 


Tuesday, June 4, 2013

Black Bean Burger

Oh, I love a good hamburger, pork burger, turkey burger, just about any kind of burger, so why not try a black bean burger. Turns out they are quite tasty and loaded with fiber and protein while being extremely low in fat. Over the past couple of years I have eaten these in various eateries. Some have been better than others, but I have not made them at home. Until last evening . . .

One of my nieces is staying at Mrs. Clark's Home Style B and B this summer. Hannah and I  have a lot in common and discovered that among our commonalities is an enjoyment of said Black Bean Burger! Right then and there we made one of our summer projects the development of the perfect BBB. Game on!

The Adventure Begins . . .

As we watched the Cooking channel on TV, Hannah and I found ourselves both on an internet hunt for that perfect burger. I think Hannah's go-to food site is foodgawker.com while mine is allrecipes.com. One is a photo gallery of food and the other is a recipe data base. Of course both sites are a doorway to much much more! We both found examples of burgers made with black beans and quinoa. Oh, there is so much to try and to learn!

It turns out that our first black bean burger might have also been our last recipe to try. It was so good, that I can't imagine experimenting further! 


This is the Black Bean Burger I had for lunch today and here is the link to the recipe I used. click here for recipe  It is actually a Quinoa and Black Bean Burger.

I used this recipe exactly as written except I only used about half the hot sauce (I was a tiny bit chicken) and I used less oil to cook the burgers.  

I followed the directions and these were easy to make. 

If you haven't used quinoa, don't be scared. It is pronounced keen-wa, and it is a very nutritious grain. You can buy it at our local grocery stores along side the rice and beans. It cooks pretty much like rice, but has a little different texture and more vitamins, minerals, and fiber than white rice. 

Chop up the veggies into tiny bits so they incorporate into the mixture and beat the egg before adding it. I used just below medium heat to cook.

We served the burgers with a green lettuce leaf and a slice of tomato. I also added a squiggle of ketchup. Use whatever you like on your burger. Last night we had our burgers along with roasted asparagus and today I had one with thin sliced peppers, onions, mushrooms and bits of tomato cooked in a tiny bit of oil and seasoned with salt and pepper. Delicious both times.

Just turned, now cooking on the second side
I used a scant tablespoon of oil to cook these three burgers and about the same amount to cook the next two. The cooked burgers kept well in the fridge and were easy to reheat on the George Foreman grill or in the microwave. 

What's next?

I have no idea! Since we found this great burger so easily, Hannah and I will be on the hunt for the best of something else. Stay tuned!