Friday, July 7, 2017

Ice Cream

On the 4th of July I was with the brothers and their families. We were eating a fabulous All-American lunch of grilled burgers (made from meat grown right there on the farm), broccoli salad, a green salad, fresh cut fruit, apple pie, a Shaker lemon pie, and some sugar cookies. Even with all that wonderful food, the talk turned to homemade ice cream. 


When we were growing up homemade ice cream was nearly a staple! At least it was made for many family gatherings and meals. Sometimes the gathering was because there was homemade ice cream! 

So, during that 4th of July lunch the discussion eventually revolved around the question of whether or not THE ice cream freezer still works. Only one way to find out! You see, our parents have been gone from this life for 6 and 7 years, so we know it hasn't been used in more than 7 years. Eventually, all the parts, the recipe, and the ingredients were located and on July 5th the great ice cream social took place. 


The recipe . . .

Vanilla Ice Cream

6 eggs, beaten
3 cups sugar
1 quart heavy whipping cream
3 Tablespoons vanilla extract
Whole milk

Combine the beaten eggs, sugar and 4 cups whole milk in a heavy saucepan. Cook over low to medium heat, stirring constantly till mixture reaches 160 degrees F. Remove from heat, cover, and cool completely.

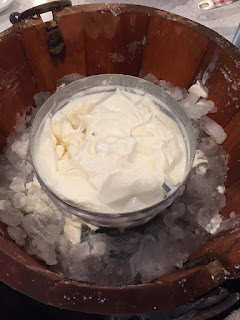
Pour mixture into the can of a 1 1/2 gallon ice cream freezer. Add the cream and the vanilla. Pour in whole milk until mixture is about 4 inches from top of can. 

Put the dasher into the can and put put on the lid. Insert into the ice cream freezer bucket. Add 3 inches of crushed ice, then 1/2 inch of rock salt. Repeat layers of ice and salt, maintaining as closely as possible the 6 to 1 ratio of ice to salt, until bucket is nearly full. Put the motor on top, locking everything into place. Turn on the motor and add more ice and salt to completely fill the bucket. Add cold water, filling in the cracks. When water starts dripping out the whole near the top of the bucket you have enough. When the motor starts to slow or balk the ice cream is nearly done. If motor stops, unplug immediately. 

A bit more info . . .

Be sure to beat the eggs until you can not distinguish the yolk from the white. 

The cooking process is necessary to kill any potentially present harmful bacteria. 

This cooked egg and milk mixture is referred to as custard. The custard must be completely chilled to make ice cream. Plan ahead and cook it the day before or in the morning for evening ice cream. If by chance you are short on time (and who isn't?) you can speed chill by putting the custard into a bowl. Put ice and water into a larger bowl or the sink and float the bowl of custard in the ice water. Stir often until mixture is chilled. You might need to add more ice to keep the water chilled. When chilled pour it into the can and proceed.


How much milk? This is where the recipe gets a bit sketchy. You might find a recipe somewhere that tells exactly how much milk, but my Mom's recipe is less exact. She always stuck her finger inside the can and poured the milk in till it nearly reached the tip of her finger. My sister Pam must have measured Mom's finger as her recipe says to stop 4 inches from the top of the can. Don't fill the can. As the ice cream freezes, air is incorporated and the ice cream expands. 

A ruler might be a better idea!
When ice cream is done, wipe off lid of the can. Remove the lid and pull the dasher. Put it into a large pan and enjoy the first few bites of ice cream that linger on the dasher. Yum! 

I like to return the lid and let the ice cream "ripen" for a bit. It will continue to harden just a bit. You can hold the ice cream for hours if you wrap it with a blanket.

This recipe is for a large ice cream freezer, 1 1/2 gallon. If your freezer only make one gallon you will need 4 eggs, 2 cups sugar, 3 cups cream and 2 Tablespoons vanilla. I will let you do the math for any other size freezer. 

I could go on and on with ice cream stories and tidbits, but I know you want to make ice cream! Happy freezing!

Saturday, February 20, 2016

Brown Rice and Black Bean Salad

An awesome event took place in our town today. It is the day for the Annual Princess & Papa's Ball, a dance for elementary age girls and their daddies. What a great way for girls to feel special, on the arm of their dad, the guys who first sees her as precious. I wish this would have been going on when my girls were growing up. The girls would have loved it and their dad would have done it for them even though he would have been way out of his element until he realized he was enjoying it! It would have been a special time as I'm sure it is for many tonight. Time to get back to what I sat down to write about!

Enter The Fairy Godmothers . . .

A group of young women saw the need for helping girls get ready for this evening and they have helped in a bigger way each year. They have dresses, shoes, nail polish, glitter and more. They set up the most wonderful beauty salon just for the girls and all day long the army of Godmothers create hair wonders, polish nails, spray perfume, add sparkle and glitter, and dress girls! I walked in to the sights, sounds, and smells of beauty! It was a wonder to behold. 

I simply made a couple of salads for the Godmothers' lunch and in delivering them I saw the magic. I had a request for one of the recipes and I thought I better share it before I forget what I did. So here we go . . .

Brown Rice & Black Bean Salad

It sounds a big drab, but trust me, it isn't!


There are lots of colorful veggies and a zesty dressing along with the rice and the beans and here is the recipe.

1 cup brown rice, cooked
1 cup frozen corn, cooked
1 can black beans, drained and rinsed
1/2 red pepper, diced
1/2 green pepper, diced
1/4 c. purple onion, diced fine
1 1/2 cup cherry or grape tomatoes, cut in half

1/4 cup fresh lime juice
1/4 cup olive oil
1 1/2 tsp. cumin
1 clove garlic, minced
1/4 tsp. salt

Cook the rice according to package directions and cool it completely. Cook the corn; do not overcook, then cool it completely.

Place cooled rice, corn and beans in a large bowl. Add vegetables and lightly mix together. 

Combine lime juice, olive oil, cumin, garlic, and salt in a screw top jar. Shake to combine and pour over salad. Lightly mix to combine and serve at once or refrigerate till time to serve. 

A Little Bit More . . .

If you haven't cooked brown rice, it takes longer to cook than white rice, about 45 minutes. Cook the rice and the corn the day before or at least a few hours before. It needs to be cold. It will cool faster if you spread it out on a plate or a pie plate. Get it thin, cover with plastic wrap and put in the fridge. Do the same with the corn. It will take FOREVER to cool if you leave it in the cooking pan. Not only does the pan have to cool, too, but the deep mass holds the heat. So spread it out and give it time. 

A recipe like this is a guideline. Let your taste be your guide. Add what you like and leave out what you don't. Avocado or cilantro would be a delicious addition in my opinion. Today I had some cauliflower and some cucumber on hand and they made their way into this salad. 

If you don't like brown rice, use white. Brown has more fiber and a few more vitamins and minerals. I have learned to love its nutty flavor. 

Another Great Salad

I also made a fruit salad for the Godmothers today. This salad has made its way to many of our family dinners. I wrote about that recipe a couple of years ago and you can find the fruit salad recipe here.


I hope you enjoy these salads!


Thursday, December 17, 2015

Creole Soup

I made this soup for dinner a couple of nights ago. A few friends were here to help eat it and someone asked for the recipe. This is an easy place to put it, so if it sounds good keep reading.

My Mom found this recipe back in the 1960's and it has been in our family ever since. A couple of days ago I went to my recipe box and horrors! The crusty old recipe card was not behind the "soup" tab. I hadn't made this for at least a year and thought maybe I could make it, but put out a quick text plea to my sisters anyway. Within a minute or so, I had an email picture of Karla's crusty recipe card! Now I have a newly written card and it is put away in the soup section.

Creole Soup

1/2 lb. ground sausage
chili sauce or chili powder
1 small green pepper, chopped
1 small white onion, chopped
1 stalk celery, chopped
4 Tbsp. butter
1/4 c. flour
4 c. chicken stock
14 oz. can of diced tomatoes
1 c. cooked rice
salt to taste

Cook the sausage and drain the grease. Add chili seasoning. 

Saute green pepper and onion in butter. Stir in flour. Blend in heated stock and tomatoes. Add sausage and bring to boil, stirring constantly. Let soup simmer 20 minutes, stirring often.

Add cooked rice and simmer 5 minutes more.

Serves 4-6. Enjoy!

Just A Little More . . .

If you really plan ahead you can cook a little rice for a previous meal and save a cup for this recipe. If you haven't, not problem. Get your rice cooking. If you aren't cooking rice for another purpose you won't need much. Boil a cup of water, add 1/2 cup rice. Turn the heat down to low, cover the pan and let it cook for 15 minutes. Check it. If water has absorbed and rice is not done, add a bit more water and let cook another 5 minutes. When it is done, remove from heat and let sit till ready.

While rice is cooking put the stock and tomatoes in your soup pan and let it slowly heat. 

In a skillet cook your sausage. Once it is done, drain the grease and remove the sausage from the pan. Give the skillet a quick rinse and melt the butter. Add the chopped vegetables and cook until tender. Stir in the flour. This blend of fat and flour (and cooked veggies, in this case) is called a roux and will slightly thicken the soup. Add this roux to the heated stock and tomatoes and stir until it comes to a boil. At this point the soup will slightly thicken. 

As for the chili seasoning, I always use chili powder. How much? I don't know, depends on my mood, probably somewhere close to a tablespoon. I just dump some in. Some times I use a little ceyenne pepper for a little more heat, too. 

Now it is time to add the cooked sausage and let it simmer. Add the cooked rice shortly before serving.

I wish I had taken some photos of this soup, but I didn't even think of it. I was having too much fun with conversation around the table. Add some salad, some breadsticks or crusty rolls and you have a wonderful meal! In fact, I think I might make this soup when my brothers come for dinner a few days after Christmas. After all, it is a taste from our youth! 

Enjoy!

Monday, October 12, 2015

Salad Dressing

For many years I bought salad dressing like many Americans. It was in a bottle and from the grocery store. I had an entire shelf inside the door of my fridge dedicated to salad dressing. There was regular and light and something for every member of the family along with those I had tried and rejected but was too cheap to throw away. What? Like on another day I would try it and like it??? Sheesh!

Then one day probably at least 10 years ago I found a recipe in the Taste of Home magazine called That Good Salad. It changed my life. I made the romaine salad, added the croutons, tomatoes, and shredded Swiss cheese like the recipe stated and I made the dressing. I was hooked! and here it is . . .

That Good Salad Dressing

3/4 cup oil 
1/4 cup fresh lemon juice
2 garlic cloves, minced
1/2 tsp. salt
1/2 tsp. pepper

Combine all ingredients in a jar with a tight fitting lid. Shake to combine. Chill. Add to salad.

How Easy Is That?!?!?!?!


Simple ingredients are used in this dressing. Yes, there is a bit of effort to squeeze that juice and mince the garlic, but it is well worth it. 

I use olive oil, but in the old days I used vegetable oil or corn oil and that worked well, too. Use what you have and what you like.

You see an entire garlic bulb in the photo, but pull it apart. The small sections inside are called "cloves". Use two of the cloves. If you really like garlic or if the cloves seem small, use more. I have also used minced garlic in a jar. It works, too.

Use fresh lemon juice for salad dressings. There is a place for bottled lemon juice, but this is not it!


I have a variety of jars I use for salad dressing. As long as it has a tight fitting lid you are good to go. Without a tight fitting lid, you will find oil on the outside of the jar. Messy. If I am making a small amount for just the salad I am serving I use a small bowl and a whisk. Use whatever works for you. Just mix it up. Oil and liquids do not mix well, so you will need to shake or whisk just before serving. 


And there is my finished dressing. You can see the garlic and some lemon pulp, along with the pepper resting on the bottom. Shake it before using to combine it all. Yum! Yum!

A word of caution. If you taste the dressing before using and turn up your nose in disgust you are not alone. Trust me! On the salad this is good. A little goes a long way. Add it to your salad, toss it together, enjoy!

This Is Just The Beginning!

That recipe was the start of my big salad dressing adventure. I realized there was a ratio of 1 part acid and 3 parts oil in that jar of deliciousness. So, the creating began. I could add other seasonings and even other oils and other acids. 

How about lime juice, oil, garlic, cumin, salt, pepper and a little cayenne pepper or chili powder? Not only is this great on a taco type salad, but it is an awesome marinade for chicken or pork chops.

How about an Asian dressing using rice vinegar for the acid, a little soy sauce, and some ginger and garlic for seasoning? I like this one on shredded cabbage, too, along with chicken.

I have used dill pickle juice for the acid along with a little dijon mustard for a great salad served with a burger.

You can sweeten things up a little by using orange juice, pineapple juice, or even apple juice as your acid. Try a little cinnamon or ginger along with. Add a bit of jam for a lively fruity taste. 

You need not make the size recipe that I have posted. Just remember the 3 parts oil to 1 part acid ratio. I often use 1 tablespoon of acid and 3 tablespoons of oil for dressing for one or two people. Just adjust the seasonings. You will only need a pinch or so. Taste before serving.

Take a quick peek through the salad dressing section of any cookbook or recipe website for inspiration, then take off on your own. Sometimes my dressing creation is inspired by a little dab of something in my fridge. The last bit of raspberry jam in the jar? Swirl a bit of balsamic vinegar in the jar to loosen it up, add the oil, a little sugar if you need it and you've got dressing! 

For me, it all started with That Good Salad. I haven't had bottled dressing in my fridge since I moved. Take a look at the ingredient list on your bottles and start your own revolution.

Let me know some of your favorites. I'm always interested in what you are cooking and I want to learn from you!

Thanks for reading!

Karen 


Monday, September 14, 2015

Grilled Pizza Update

After many months of silence on this site I have found a delicious reason to write again, and that reason is . . .


Grilled Pizza Update

If you have been following this blog you might have stumbled upon grilled pizza and maybe you have even made it! You will never know how happy it makes me to hear that you readers have tried something from these pages! 

I have continued to tweak and improve the process. I don't know who first said something like, "You should try some dessert pizza." I wish I knew who planted that bug but I don't. One day last year while my walking buddy turned good friend and sometimes kitchen companion Michele and I were hoofing it along our local path we talked through our thoughts on grilled pizza and I think we started experimenting right away. After many attempts, mostly delicious I have settled on this as my preferred method of . . .

Dessert Pizza!

Looks good, but wait till you taste it!

Start with the basic pizza crust dough from the grilled pizza page, remember that this recipe is for two of these smallish pizzas. It is the perfect little ending to your delightful grilled pizza event.

Apple Pie Pizza

1/2 cup water
1 Tbsp. cornstarch
1 tsp. cinnamon
1/8 tsp. nutmeg
1 Tbsp. honey
1 apple, thinly sliced (I used 1/2 granny smith and 1/2 gala)

Add water to small saucepan and stir in cornstarch until it dissolves. Stir in cinnamon, nutmeg and honey. Add apple slices. Cook and stir over medium heat until sauce is thickened and apples begin to soften. Set aside.

Crumb Topping:
1/4 cup quick oats
1/4 cup flour
1/4 cup brown sugar
1/4 cup cold butter
1/2 tsp. cinnamon

Put all ingredients in a small bowl and use a fork or pastry blender to combine. Set aside until time to make pizza.

To grill the pizza follow the directions at grilled pizza page for spreading the dough and grilling. Once you have grilled the crust on one side and flipped it over, spread on a little softened butter, then the apple filling. Top with prepared crumb topping. Grill until bottom of crust is golden brown. Remove from grill and cut into 6 or 8 pieces. Savor and enjoy!

Peach Pie Pizza

1/4 cup water
2 tsp. cornstarch
1-2 tsp. honey (if peaches are really sweet I usually omit)
2 ripe peaches, peeled and thinly sliced

Add water to small saucepan and stir in cornstarch until it dissolves. Stir in honey and add peaches. Cook and stir over medium heat until sauce is thickened. Set aside.

Follow directions from Apple Pie Pizza for crumb topping and grilling.

Mixed Berry Pie Pizza

1/4 cup water
2 tsp. cornstarch
1-2 tsp honey
1 cup strawberries, raspberries, blueberries (one or any combination)

Add water to small saucepan and stir in cornstarch until it dissolves. Stir in honey and add berries. Cook and stir over medium heat until sauce is thickened. Set aside.

Follow directions from Apple Pie Pizza for crumb topping and grilling.

A Few More Tweaks . . .

Besides the addition of dessert pizza to my menu I have continued to let the pizza process and combinations evolve. Pizzas are rarely the same, but it is always a fun and yummy experience. I love to have the table on my deck filled with friends and family and we let the grilling begin. On the best days I have the dough ready, the toppings assembled on a platter, all the tools and pans I will need close at hand, the wine chilled, and the salad made. Off we go!

One of my favorite combinations . . .

I call this Greek Pizza

The crust is brushed with olive oil or olive oil warmed a while with a few cloves of sliced garlic and some basil and oregano leaves. Then the pizza is topped with black and green olives, red onion, torn basil leaves, mushrooms (although I don't see any in this corner piece) and feta cheese. Some cooked sausage and chopped artichokes are also good on this pizza.

Michele and I seem to feed off each other. One of us makes a suggestion and our food talk turns into action. She mentioned that she sautés her veggies for pizza. Great idea! I especially like the mushrooms and onions sautéed a bit in olive oil before adding to the pizza. 

Try some new sauces and toppings. How about Alfredo sauce, grilled chicken, lightly cooked chopped broccoli and some parmesan cheese? Or maybe brush the cooked crust with ranch dressing, add grilled chicken and cooked crumbled bacon with parmesan or mozzarella?

While making pizzas for a bunch of teenagers Michele and I made a S'mores pizza on a whim one night. Brush the crust with melted butter. Add some crushed graham crackers, milk chocolate chips, marshmallows. We heard it was really good, but we didn't get a chance to find out!

I am dreaming of the day I try a chocolate pizza of some sort. Stay tuned for that.

My Bossy Boots sister Pam has been hounding me for a salad dressing post and I have one formulating in my head about Pesto, too. Hey! I need to put some of that on a pizza! Anyway, I have plans to write again before long.

Now for the big exciting news. . .

This might be part of the reason I have not been writing. I am now a grandma! In early June baby grandson Clark Alexander arrived to steal my heart. He has quickly turned into my very favorite guy. He has lots of his daddy's features, but his mommy's blue eyes. He has wonderful expressions as his little personality is beginning to become evident. He lives a short two hours away so I see him almost every week. I'm sure his stories will be sprinkled in with my recipes. 

Thanks for reading what I write. Don't forget to let me know all about your dessert pizzas!


Friday, January 9, 2015

Biscuits Supreme

What could be more comforting on a cold day than hot flaky biscuits with a crisp buttery crust? It is the perfect pairing for a hot steaming bowl of soup. Forget the biscuits that come from the dairy case at the grocery store. You can make your own, easy-peasy, with a few simple tools and ingredients. Read on for the recipe and some helpful hints, but here are the basic tools you need.


You will need a pastry blender, a rolling pin, and a biscuit cutter.

You will also need measuring cups and spoons, a wooden spoon for stirring, a bowl, and a baking sheet. Basic!

Biscuits Supreme

2 c. flour
1Tbsp. baking powder
2 tsp. sugar
½ tsp. cream of tartar
¼ tsp. salt
½ c. cold butter
2/3 c. milk

Stir together dry ingredients.  Cut in butter till mixture resembles coarse crumbs.  Make a well in the center and add milk all at once.  Stir until moistened.

Turn dough onto a lightly floured surface.  Quickly knead by gently folding and pressing dough 10 - 12 strokes or till nearly smooth.  Pat or lightly roll dough to ½ inch thick.  Cut dough with a floured biscuit cutter.

Place biscuits 1 inch apart on an ungreased baking sheet.  Bake at 450 degrees for 9-11 minutes or till golden.  Remove from baking sheet and serve hot.

Keep reading for the helpful hints . . . 

Before measuring or mixing turn your oven to 450 degrees!

Cut the butter into 8-10 chunks or slices, then use the pastry blender to chop it up and incorporate it into the dry ingredients. Make sure the butter is cold!

I like a pastry blender that has blades rather than one that has wires. The one with the wires will be broken in no time.

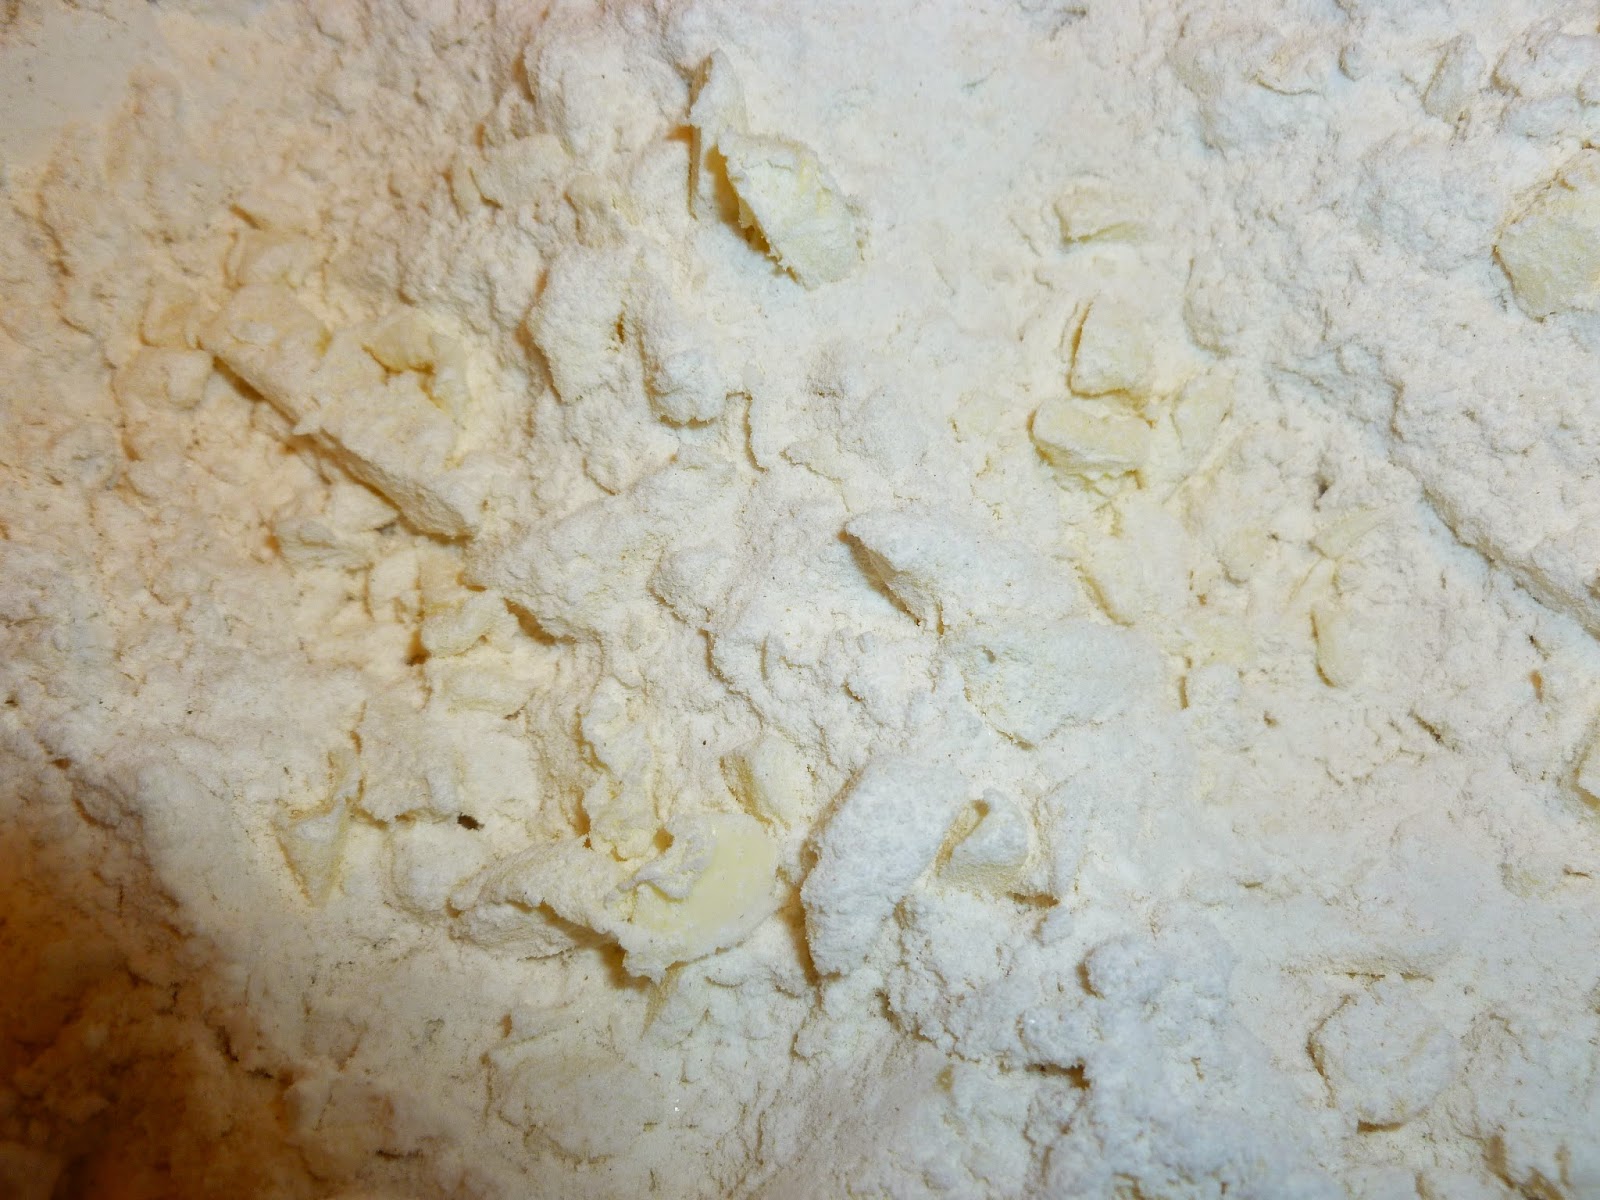
Cut in the butter until it is in pieces about the size of round green peas. These will still be chunks, some might even be a little bigger than peas. Put aside the pastry blender and measure the milk.

 Using your wooden spoon, make a well in the center of the dry ingredients.

 Pour the milk into the well.

Use the wooden spoon to combine the milk with the dry ingredients. The mixture will be 
lumpy. Stop stirring when you see no more flour. Do not over mix!

 Spread some flour around on the counter. Dump the dough out.


 Use your hands to gently push it all together into a rough ball.

 Put some flour on your hands. Fold the dough over in half and gently
press it. Turn it 45 degrees and repeat 10-12 times. Do this gently! 
You are creating flaky layers. 

After kneading 10-12 times the dough will be a smoother ball with
visible chunks of butter. This is what makes the biscuits flaky.
Stop kneading after 12 or your biscuits will be tough from over
development of gluten in the flour. Is that more than you
wanted to know? Trust me! Stop kneading.

 Gently roll the dough to a bit less than 1/2" thickness.
It is too thin at 1/4", but 1/2" seems a little thick to me.
So, get it somewhere between the two.

 Cut your biscuits as close together as you can. 
Leave as few scraps as possible, but save the scraps that you have.

 There aren't many scraps left, but don't throw them away!

Push the scraps together into a ball. Flatten it with the rolling pin and
cut some more biscuits! You won't be sorry!

 I used my 2" biscuit cutter and I made 20 biscuits. 
Your cutter might be larger and you will have fewer, of course.

 I have two old biscuit cutters. The one on the left belonged
to my Grandma Seyb and I got it from my aunt last summer. 
I think it is a treasure!
The one with the red handle belonged to my mother.
Another treasure!
What a blessed baker I am.

 The biscuits bake quickly. These babies were golden in 9 minutes.
Just enough time to clean up the kitchen.

Look at those buttery layers! Grab the jelly and
eat them while they are hot! 
Remember when the dough was less than 1/2" thick?
Well, look at it now!
Light, flaky, delicious!
You probably can't eat just one.

Enjoy!

I first found this recipe in a Better Homes and Gardens Cookbook. A few years later a new edition came out and the recipe was not the same and I didn't like it as well either. So, I still use this old one. I have tried other recipes, but this is my favorite. I hope you enjoy it as much as I do.

Friday, December 19, 2014

Kringla

Today's post is written for the next generation of Clarks, my daughters and their cousins, who miss the taste and smell of Grandma's kitchen.


My first introduction to kringla, a Norwegian cookie, was Christmas eve 1975, my first Christmas with Sam's family. That evening I learned not only about kringla, but also about oyster stew, lefsa, and krumkake. Kringla is the tasty treat that Sam's mother made throughout the year and one that I know Sam missed. Eventually, I acquired the recipe and baked kringla, too. I'm not sure that my kringla tastes quite like Grandma Opal's or MumMum Hannah's, but here's how I make it . . .

Kringla

1 1/4 cup sugar
1/2 cup butter
2 egg yolks
1 cup sour cream
1/2 cup buttermilk
1/2 tsp. lemon extract
2 tsp. baking powder
1 tsp. baking soda
3/4 tsp. salt
1/2 tsp. nutmeg
3 cups flour

Cream the sugar and butter together with electric mixer. Add egg yolks and beat well. Add sour cream, then buttermilk beating well after each. Stir in lemon extract. Sift dry ingredients and stir into mixture. Chill dough overnight. 

On well floured counter roll out spoonsful of dough into long thin ropes and shape into pretzel shape. Bake 8-9 minutes at 375 degrees until barely beginning to brown. Cool on waxed paper or cooling rack. Store in covered container or freeze. 

I use a scant tablespoon of dough for each kringla.
Scoop it out of the bowl, and scrape it out of the spoon
and onto the counter.

I plop about a dozen out onto a well floured
counter then put the bowl back in the fridge.
Keep the dough cold or it will get too
sticky to handle easily.
Use your hands to roll each blob of dough
into a skinny log. Stop when you get a little
bigger than a pencil. It should be 8-9" long.
If longer pinch an end off. When you get a
few extra ends, roll those together to make
another kringla. Think play dough here!
Also, use plenty of flour on your counter!
Pick up your dough log by the ends and quickly move it
to your cookie sheet. I sort of use my other fingers
to support the whole thing as I move it. Lay it down
and loop the ends around to make the above shape.
I line the cookie sheets with parchment paper, my baking
friend! It keeps cookies from burning and makes
clean-up a breeze.The kringla in the picture is baked.
They are really skinny before baking. I forgot to take a
picture of the raw, shaped kringla. Sorry!
It takes a little practice to get them onto the
cookie sheet, but after you bake a pan or two you
will be a pro! This is the shape I use, but Grandma
had some variations. Can you remember what
her's looked like? Originally these were "dunking cookies"
and were often baked a little longer than I bake mine.
I like them soft so I bake them 8-9 minutes at 375. The
original recipe said to bake at 450 degrees for 10-12
minutes. If you dunk yours in milk or coffee you
might want to bake hotter and longer than my recipe.

Now you can make kringla, too and your kitchen can smell and taste just like Grandma's!
Have fun!