Saturday, December 21, 2013

Two More Cookies

I promise to get back to more nutritious recipes soon, but first I must write about two more of my favorite Christmas cookies. I know most of us are finished with our Christmas baking, but now the recipes will be on file for next year

I found the recipe for this Chocolate Covered Cherry Cookie quite a few years ago in The Taste of Home magazine. It is a dark chocolate cookie with a maraschino cherry in the center and a rich chocolate frosting on top. If you like chocolate covered cherries you will love this cookie! They are a little labor intensive, but well worth the effort.


Chocolate Covered Cherry Cookies

1/2 c. butter
1/2 c. white sugar
1/2 c. brown sugar
1 egg
1 1/2 tsp. vanilla
1 1/2 c. flour
1/2 c. baking cocoa
1/4 tsp. salt
1/4 tsp. baking powder
1/4 tsp. baking soda
48 maraschino cherries, blotted dry
for frosting:
1 c. semisweet chocolate chips
1/2 c. sweetened condensed milk
1 to 2 Tbsp. maraschino cherry juice

In a mixing bowl, cream together butter and sugars until fluffy; beat in egg and vanilla.  Sift together the dry ingredients gradually add to creamed mixture. The dough will be very firm. Shape into 1 inch balls (or a little smaller) and place on ungreased cookie sheets about 2 inches apart. Push one cherry into each ball of dough. For frosting, melt chocolate chips in sweetened condensed milk in a small saucepan over low heat, stirring constantly. Remove from heat, add cherry juice and stir until smooth. Spoon 1 teaspoon of frosting over each cherry. Bake at 350 degrees for 8-10 minutes. 

The rest of the scoop . . . 

I make a double batch of the dough and a single batch of the frosting. I never run out of frosting. 

I cut the cherries in half, or even thirds. I also make the cookies smaller than 1 inch. I use my small cookie scoop and the balls are probably about 3/4 inch. 

Use parchment paper on cookie sheets. If a bit of frosting runs off the cookie it sticks badly and parchment paper will save the day when it comes to clean-up.

Yes, the frosting goes on before you bake the cookie! I know that doesn't seem right, but it is. Trust me. 

Like most other cookies, I take them out of the oven when the edges begin to set up. Let the cookies finish baking on the cookie sheet for about 5 minutes. Then carefully remove and let completely cool on wax paper on the counter.

I know the recipe says it makes 4 dozen cookies, but I usually get at least 5 dozen from each single batch. I make the cookies just a little smaller. At Christmas time I like small cookies so I can sample lots of different ones. 

These cookies freeze well. I pack them in a covered container with wax paper between the layers. You can take out just a few at a time as they are ready to eat within minutes. Delicious!

I use this little spoon to make an indentation in each cookie.
Put the cherry in the indentation.
Frosting goes on top and this cookie is ready for the oven.
Baked and cooking on the counter.
Don't pack them away until completely cooled.
The next cookie is much easier to make. It is a simple drop cookie which is a lightly spiced cookie. My friend Robin gave me this recipe about 25 years ago right before Christmas and I have made it every year since. I do not know how this cookie acquired the name "Letha's", but that is what it is called. I suppose someone named Letha created the recipe at one time or another. Interestingly, I have an Aunt Letha and I always think of her, but the recipe did not come from her. Enough of that, here's the good stuff . . .

Letha's

1 c. sugar
1 c. brown sugar
1 c. shortening
2 eggs
2 1/2 c. flour
1 tsp. baking soda
1 tsp. baking powder
pinch of salt
pinch of ground cloves
1/2 tsp. nutmeg
1/2 tsp. cinnamon

In a mixing bowl, cream together the sugars and the shortening until fluffy. Beat in the eggs one at a time. Sift the dry ingredients and add gradually to the creamed mixture. Drop onto greased cookie sheets. Bake at 350 degrees 6-7 minutes. 

A little more scoop on this . . .

About the only thing I do differently is to use parchment paper (don't I always?) instead of greasing the cookie sheets. I use my smallest cookie scoop to drop the dough onto the cookie sheets and this recipe gives me about 8 dozen little cookies. Lovely!

This is a wonderful little cookie which is perfect with a nice cup of tea.

And that, my friends, is more than enough cookie baking for one year! But I must share one more bit of Christmas fun.


Shortly before my mother died she gave away many of her Christmas ornaments and decorations. I had many Christmas things of my own, but I did take a few things. My girls each took a box of the vintage ornaments. I have been using them ever since. I brought them home and they went on my tree that very Christmas. I love them. Every one is different, and beautiful. As tonight's snow is beginning to fall I am sitting in the twinkle of my Christmas tree, these ornaments are shining in the living room and it is so very pretty. I know one day these ornaments will look beautiful on my daughters' trees, too, and I imagine they will be making some of these same cookies, too. Aaah, traditions!

Merry Christmas!
Karen

Tuesday, December 17, 2013

Mom's Cream Caramels

Christmas time has always meant it was time for Mom's caramels. She began making them the first Christmas of her marriage and over time the tradition took on a life of its own. I just remember caramels were always yummy and Mom was a little bit famous for Audrey's Caramels. She once told me that God gave us an extravagant gift that first Christmas and this was one way she honored that extravagance. Some years she made over 30 batches of these to give away. Last night I was reminded that she often donated a batch to their church's annual auction and big money was paid by the winning bidder. 

My sister Karla and I have tried to keep up her tradition but between us we don't come close to Mom's total! I think we have come closer in quality than in quantity and for that I am grateful.

I have had a couple of people ask for tips and advice since I shared the recipe on my Facebook page yesterday. I decided this would be the best place to do just that. After all, my daughters and Karla's might some day need this advice, too.

Don't they look scrumptious?

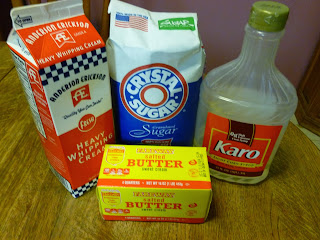
All that deliciousness from these simple ingredients.

Audrey's Cream Caramels

2 c. sugar
3/4 c. light corn syrup
1/2 c. butter
2 c. cream

Mix first 3 ingredients plus 1 cup of cream. Bring to a boil, stirring constantly. Then stir in rest of cream. Stir frequently as mixture begins to thicken, constantly as it darkens. Cook to 254 degrees. (A little dropped into cold water forms a hard ball.) Pour into buttered 7 or 8 inch square pan with 1/2 cup nuts scattered on the bottom if desired. when cold, cut into squares. 

For chocolate caramels, add 2 squares of unsweetened chocolate with first ingredients.

The rest of the story . . .

Mom's hand written recipe credits the Betty Crocker cookbook, probably the one she received as a wedding gift in 1951. 

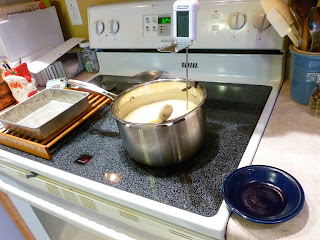
Before starting to cook, get everything set up. I have a heavy 4 quart saucepan. You need one about that big. A candy thermometer is helpful. I splurged on a digital one a couple of years ago and have been glad every time I make another batch. I use a wooden spoon to stir.

Butter the pan and set it on a cooling rack. Butter another small dish and set it aside.

Although the recipe says to cook to 254 degrees, I pull it off the heat at 252. The thermometer moves very slowly until it reaches 240 degrees. Then it begins to move a little faster and by the time it reaches 250 degrees it is climbing quickly. At 252, immediately pour the mixture into the buttered pan, but do not scrape the sauce pan! Scrape the last bit out of the pan into the little dish you have buttered. That remaining mixture has usually cooked to 254 degrees or beyond simply by remaining in the hot pan. I will leave to your imagination what you should do with this last little bit. 

The caramel is very hot. Take care not to drop any on your skin. It will burn and blister. I speak from experience. Be careful! Whatever you do, do not lick the spoon! 


Buttered pan on cooling rack, small buttered dish near by,
thermometer in place
 
Mixture is light colored when cooking begins.
I begin with medium high heat.
When mixture boils, turn to slightly below medium.
As mixture darkens, stir constantly.
Now you are making progress!

Here's that last bit I put in the little dish. You can see that some
of it is darker. It will be more hard than what is in the pan.
Once the pan of caramel has cooled it is time to cut the caramels. My Dad was always the cutter and Mom was the wrapper. They wrapped each caramel in little squares of foil. Each one was wrapped like a tiny present. Now that I think of it those little silver cubes sort of go along with the story of extravagance. Karla is true to tradition as she wraps her caramels in foil. I have switched to waxed paper. I find it easier to wrap and easier to unwrap as well. Your choice.

I tear off strips of waxed paper and cut it into fourths. I pile up about 10 and cut them altogether. I do this while watching TV and I keep them in a plastic container, just waiting for action.

My little pieces of waxed paper waiting to wrap caramels.

I lay a caramel diagonally on a piece of waxed paper and wrap it starting in one corner and all the way across. Then I twist the ends. Voila! One wrapped caramel and 143 or so to go!

All wrapped up and waiting to be given away.
I am a little bit ahead of myself. The caramels need to be cut before they can be wrapped! 

Turn the pan upside down on a cutting board. If it doesn't fall out of the pan you need to put a thin metal spatula down the side of the pan and loosen it up. You might have to do this on all 4 sides. It will come out. Trust me!

Cutting is a bit tedious, but well worth it!

I use a sharp knife with a long blade. I cut across into 12 strips, sometimes 13 if it works out that way. Then each strip is subcut into 12.

These keep well for several months, maybe more. I store them in tins or plastic containers with tight fitting lids. I usually store in a cool spot like my basement or my garage. 

You will know if the mixture is gets overcooked. It will be difficult to cut. In fact it might shatter or crack. In this case be very careful of dental work! 

I can't help but remember Mom while making these caramels. I can see her standing by the stove stirring. I also have fond memories of watching my parents cutting and wrapping caramels late at night as we kids trotted upstairs to bed. 

I love hearing comments from people who recall enjoying Mom's caramels. I doubt if she had any idea what a tradition she was birthing back 60 some years ago while she was pouring over those new cookbooks choosing her Christmas recipes. I guess that's the way traditions are born, completely unplanned, simply a success that is repeated. 

Enjoy!


Sunday, December 8, 2013

More Christmas Cookies

After another busy day of baking cookies I discovered some horrible news about the death of a young man with a big personality in our community. My cookie baking endeavor seemed so trite and unimportant in the shadow of that loss. Many of the emotions of my husband's death came rushing back as that news became real. Later in the evening one of my good friends put it into perspective for me by saying that my cookie baking was not insignificant, that we need beauty and delicious in our insane and painful world. She helped me keep my focus on the hope of heaven, that beautiful gift of our Savior which we celebrate this season. So, on we go, living in this sinful world, but keeping our eyes on heaven, our real home with our glorious God and Father.

That was last night. The news is still reality, but celebrating is reality, too. We had a beautiful cantata sung in church this morning, the Sunday School children did a delightful little program, we had a church fellowship lunch and all the while the beautiful white snow was falling and blowing around. I came home, turned on the carols and the oven and the baking continued!

Chocolate Cutout Cookies


1 1/2 c. flour
3/4 c. cocoa powder
1 1/4 tsp. baking powder
1/8 tsp. salt
3/4 c. butter, softened
1 1/4 c. sugar
1 egg

Sift together the dry ingredients and set aside. 

Cream together the butter and sugar until light and fluffy. Beat in the egg.

Stir in the dry ingredients to form a soft dough. Divide dough in half, flatten into a disk and wrap each piece tightly in plastic wrap. Refrigerate 2 hours.

Preheat oven to 375 degrees. On a lightly floured surface, roll the dough out to 1/8" thick. Cut into desired shapes with cookie cutter. Add flour to counter as needed. Use a flat thin spatula to move cut cookies to cookie sheet. Bake 7-8 minutes or until edges begin to firm. Remove from oven and cool 5 minutes on cookie sheets before removing
                                     
****************************************

This cookie has tons of chocolate flavor, serious chocolate, and is delicious with a touch of frosting. 

Sugar Cookies

In my mind this is a traditional Christmas Cookie. My mom baked lots of cutout cookies and set us kids at the table with bowls of colored frosting, containers of colored sugar, and those little silver balls, and we went to it! Mom's cookies always looked so much better than the ones done by us kids, but she let us "help" none the less. My brothers soon tired of the whole project and if my memory serves me correctly they would begin mixing the colors together inappropriately and were soon allowed to be off to something more to their liking. Mom would then pack away the cookies into some big metal cans she had and she kept them in the cold unheated stairway. I can still remember how delicious those cookies tasted. 


1 c. butter
1 c. sugar
3 eggs
1 1/2 tsp. vanilla
3 1/2 c. flour
1 tsp. baking soda
2 tsp. cream of tartar
1/4 tsp. salt


Cream together the butter and sugar until light and fluffy. Add the eggs one at a time, beating well after each egg. Add vanilla and stir to combine. Sift the dry ingredients and stir into the creamed mixture to form a soft dough.

Cover dough and refrigerate at least two hours. 

Roll dough to 1/4" thick on a well floured counter. Cut into desired shapes with cutters.

Bake at 375 degrees for 6-8 minutes. Remove from oven when cookies begin to firm at the edges. For soft cookies do not let the edges brown. Cool on cookie sheets for 5 minutes before removing.

*************************************

This recipe came from one of Mom's friends. The recipe is written in my mother's handwriting and Inez Koch is credited for the recipe. These recipes hand written by Mom are precious to me. It isn't even the recipe Mom usually used, but I love it anyway. 

I don't have many words of wisdom for these recipes that I haven't given before. I can highlight a few but read my other cookie posts for more detailed explanations if necessary.

Measure carefully. Follow the directions for mixing. Line baking sheets with parchment paper. Do not over bake. Have fun!

I use the frosting recipe from my last post. Over the years I have streamlined the process by using only my very favorite cutters and frosting all cookies the same. I put a different color of frosting in each bag and do one color at a time with cookies laying out flat on the counter. With a little practice you will make beautiful cookies, much more easily and quickly than you can by frosting with a knife or spatula. Allow the frosting to harden before packing the cookies in tightly covered containers with waxed paper between the layers. The cookies will stay soft and fresh if frozen or kept in a cold place. If you don't have freezer room keep them in a cooler on your back deck or in an unheated garage. If packaged carefully you will have delicious cookies till Christmas time.

The Back Story . . .


I can not bake without making a mess. Need I say more? 

Beauty of the season . . . 

View out my door as I finished my Chocolate Trees this evening.
Let It Snow!


Friday, December 6, 2013

Christmas Cookies

I have enjoyed baking since I was old enough to watch/help my Mom bake cookies. I was hooked back in the days when we did it all with a big bowl and a wooden spoon. In our family Christmas cookies have always been a step above a regular every day cookie; it had to be something a bit special. So, I still have some cookies that only get made at Christmas time or maybe for some other special holiday. 

About 25 years ago our church began the Cookie Sale on the second Saturday of December. For $12 the customer gets a red plastic bucket with a lid, puts on a plastic glove and fills the bucket from the many trays of beautiful cookies spread out on the tables. This wonderful event has given me a good excuse to go a bit overboard on my Christmas cookie baking. 

Yesterday was the day the annual baking began at my house. It was Chocolate and Mint day and I made two fun recipes, multiple batches. Today was frosted sugar cookie day. Oh, these are fun to make! Tomorrow continues with rolled cut out sugar cookies, but that will be another blog post. 

On with it!

No Roll Sugar Cookies


1 c. butter
1 c. sugar
2 eggs
1 tsp. vanilla
1/2 tsp. almond flavoring
2 1/3 c. flour
1/2 tsp. baking soda
1/4 tsp. salt

Cream together the butter and sugar until light and fluffy. Add eggs one at a time beating well after each egg. Stir in vanilla and almond flavoring. 

Sift together the dry ingredients and add to creamed mixture. Stir to combine.

Roll in balls or use a cookie scoop. Place on cookie sheet, spaced about 2 inches apart. Flatten with a glass dipped in sugar. Bake 6-7 minutes at 375 degrees.

When baked, the cookies look like this.
Add frosting if you wish.

Fantastic Frosting For Cookies (or eating)

I used to make frosting by guess and by golly, some butter, some powdered sugar, some milk, adding enough of each to get the consistency right. A few years ago the girls insisted that I write down the recipe so we did. I measured as I made the frosting, we wrote it down and the girls named the recipe. I have been measuring ever since!

2 sticks butter
1 1/2 tsp. vanilla
2-4 Tbsp. milk
5 c. powdered sugar

Beat the dickens out of the butter so it is soft and creamy. (We got a little Grandma Audrey language in while writing this recipe) Add the vanilla and beat well. Add 2 cups of powdered sugar and continue beating. Add 1 tablespoon milk and beat it some more. Add remaining powdered sugar 1 cup at a time, beating well after each cup. Add another tablespoon of milk after the third cup and add more as necessary till the frosting is easy to spread. I usually use 3 and sometimes 4 tablespoons of milk. 

White Chocolate, Chocolate Cookies


1 c. butter
1 c. sugar
3/4 c. packed brown sugar
2 eggs
1 1/4 c. unsweetened cocoa powder
1 3/4 c. flour
2 tsp. baking soda
2 c. white baking chips


Preheat oven to 350 degrees. 

Cream together the butter, brown sugar, and white sugar till light and fluffy. Add the eggs one at a time, beating well with each addition. Combine the cocoa, flour, and baking soda, gradually stir into the creamed mixture. Finally, fold in chips. Drop by rounded spoonfuls onto cookie sheets.

Bake 8 minutes until puffy but still soft. Allow cookies to cool on pans for 5 minutes before removing. 
                                 * * * * * * * * * * * * * * * * * * * * * * * * * * * * * 

The original recipe came from www.allrecipes.com, one of my favorite recipe sites.

I have made these cookies with many variations and this one used Holiday Mint M&M's instead of white chips.


Tips for great cookies . . .

  1. Measure carefully. Spoon flour into the cup and level it off. Pack brown sugar. Use the cups and the spoons!
  2. Cover cookie sheets with parchment paper. Cut one piece for each cookie sheet and use it all day. This not only protects cookies from burning on the bottom, but it makes clean up easy peasy.
  3. Bake in the center of the oven. I bake cookies one pan at a time, but if you bake on two racks, rotate half way through.
  4. Do not overbake! Take cookies out when they are beginning to feel firm-ish at the edges, but are still very soft in the center. Leave them on the cookie sheet for about 5 minutes and they will firm up. Then remove. Many recipes say to cool on wire racks. I spread waxed paper on the counter and cool cookies there.
  5. Sift the dry ingredients. It will not only thoroughly mix everything, but it adds air.
  6. Pack cookies away carefully. You want these cookies to stay fresh and tasty through the next weeks. Put waxed paper between the layers of cookies and put them in containers with tight fitting lid. Store in the freezer or somewhere cold. I stash cookies in my garage or in a cooler on the back deck.  Keep them cold, they thaw out quickly. 
  7. Have fun! Take time to bake with your kids and grandchildren. Share, give and enjoy.

One More Note . . .

I love baking in my new kitchen. Everything is just a little bigger and there is more room to move around. Even though it is wonderful, it isn't exactly right. At the old house Sam was often home when I was doing the holiday baking. He would have the wood burning stove fired up in the sunroom and I would have the oven going in the kitchen. The house was cozy and warm, bordering on hot. He would walk through looking for cookies that weren't quite right. He would offer to take the ones that were a bit oddly shaped or a bit more brown than I liked. He might linger in the kitchen for a while before moving on to the computer or the TV or whatever he was doing. I miss that. Hold on tightly to those you love. 


Thursday, December 5, 2013

Vegetable and Sausage Bake

I have been making something similar to this for several years, but recently daughter Rachel gave it a great new twist, sausage! This will give you a chance to get creative. I don't really have a recipe, but I can give you some guidelines to get started. I am giving this a name on the spot, Vegetable and Sausage Bake, but you can call it whatever you want. This is how it turned out tonight . . .


Can you identify everything here?

Here's What We Did . . .

Use a variety of vegetables. Root vegetables work really well, but so do many others. Tonight I had dinner with family friends. Two of the kids and I prepped these vegetables, carrots, celery, a parsnip, an acorn squash, brussel sprouts, a yam, and some cabbage. We peeled and we chopped. Then everything went into a big bowl. We added a drizzle of olive oil and stirred to coat it all. We added some salt and pepper and filled a baking sheet, one with sides. We covered it with foil to keep in the steam and we baked it at 350 for about a half hour. 

While that was baking some brats gently boiled in some water to get them pre-cooked part way. Put the brats on a cutting board and cut them into chunks. When the veggies have cooked about 30 minutes give them a stir and add in the sausages, cover and cook for another 20 minutes or until fork tender. 

Meanwhile, grate some parmesan cheese, or any kind you like. Now stir up the veggies and sausage and add the grated cheese. Put it back in the oven long enough to melt the cheese.

Some cut fruit, strawberries, blueberries, a kiwi, and banana and some breadsticks rounded out a simple and delicious meal for 6.

Make It However You Like . . .

When Rachel made this for me she used butternut squash, onion, a red pepper, a yam, and cabbage (one of her very favorite foods, just saying') and she used ground Italian sausage, browned in a skillet. She topped it with parmesan cheese. Super delicious!

I love, love, love learning things from my kids. Again, just saying'.


Monday, December 2, 2013

Cinnamon Rolls

This evening as I was having dinner with some of my quilting friends, Mrs. Clark was gently reminded that it has been quite some time since she has written about her kitchen fun. So tonight is the night. I will take a break from the Christmas decorating and write about one of my favorite things to bake. . .

Cinnamon Rolls!

I don't make these often, but they make a real treat on special occasions and plenty of special occasions are coming up. These take a commitment of time, but can be done over the span of two days if you wish. 

1/4 c. warm water (105 - 115 degrees)
1 pkg. dry yeast
1 tsp. sugar
3/4 c. warm milk
1/4 c. sugar
3/4 tsp. salt
1/4 c. butter, very soft or melted
1 egg
3 to 3 1/2 c. flour
for filling:
1/4 c. soft butter
1/4 c. sugar
1 Tbsp. cinnamon
for frosting:
2 c. powdered sugar
2 Tbsp. soft butter
1/3 tsp. vanilla
3 Tbsp. milk

Dissolve yeast and 1 tsp. sugar in the warm water. Let stand about 5 minutes or until a bubbly foamy layer develops.

Combine the warm milk with sugar, salt, soft or melted butter, egg and 1 1/2 cups of the flour in a large mixing bowl. Add the yeast mixture and beat until smooth. 

Using a wooden spoon, gradually stir in remaining flour. Use enough flour (usually 1 1/2 to 2 cups more) to make a soft dough which leaves the sides of the bowl in a ball, adding more flour as necessary. 

Turn dough onto a floured surface. Knead 5 to 10 minutes, until dough is smooth, elastic, and no longer sticky.

Return dough to well oiled bowl, cover and let rise until double in bulk, about 1 hour.

Punch dough down with fist. Roll into a rectangle about 12 inches wide and 18 inches long. Spread with 1/4 cup soft butter. Sprinkle with mixture of cinnamon and sugar. Roll into a 12 inch log. 

Cut into 12 pieces with dental floss by wrapping floss around the log, crossing the floss, and pulling it tight. Place the rolls in a greased 9" x 13" pan. Cover loosely with waxed paper or a towel and let rise till rolls double in size. 

Bake for 20-25 minutes in 350 degree oven. Rolls will be lightly browned and sound slightly hollow when done. 

Combine ingredients for frosting; stir until creamy, adding a few more drops of milk if necessary. Spread over rolls.

A few things I've learned along the way . . .

Dissolving the yeast in warm water is called "proofing" the yeast. It becomes active, starts to grow and produces carbon dioxide which makes the dough swell up and become light and airy. If the water is too hot it will kill the yeast. If the water is too cool the yeast will not become fully active. Use a thermometer to check the water temp to be safe.

How much flour? If you don't use enough the dough will be very sticky and difficult to work. If you add too much the rolls will be dry and tough. I have found that "enough" is when the ball of dough first begins to roll around in the bowl without sticking to the sides. I know that isn't a very scientific explanation, but after you do this a couple of times it becomes more obvious how much is enough.

Kneading . . .

Put a handful of flour on your counter or table top and spread it around. Dump the dough out onto the flour and put a little flour on your hands. Now FOLD the dough i half and lightly PRESS it down. Then TURN it 180 degrees and repeat the process. Just remember 3 little words: fold, press, turn.

Fold, Press
Turn, then repeat. Fold, press, turn.
Oil your bowl. Put the dough in top side down. Roll it around so the top is coated with oil, then turn it over. Cover the bowl and set it aside to rise.

Oiled dough in the bowl.
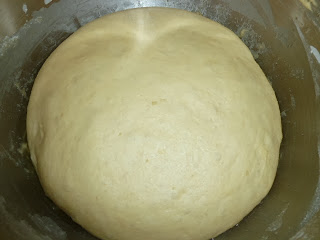
Dough is doubled in size.
Punch it down.

From ball of dough to sheet of dough . . .

Put some more flour on your counter and get out your rolling pin. Dump the dough onto the floured counter. Flour up your rolling pin and roll away! Roll from the center out and pay attention to the corners. Work at making a rectangle. Since you are starting with a round ball of dough it naturally rolls into an oval. You are the boss of this dough and you want a rectangle. It can be done, but you need to take charge. Give a few extra rolls out to those corners and use the side of your hand to push the top and sides back in to help form the sharp edges. Just work at it and don't give up! Lately I have been skipping the rolling pin and have just been patting the dough with my hands. Either way works. Use the method you prefer.

You want 12" x 18" or so.

Spread on the butter and get it all the way to the edges!
Add the cinnamon and sugar. I use a shaker, but a spoon works, too.

Start at the narrow end and roll it up.

The rolled up log.

Cut the log . . . 

The log can be sliced with a knife, but it tends to smash the log. Try a piece of dental floss or thread. Center it under the log, pull up the ends and cross them tightly. It will cut right through the log and retain the shape. 

Cut it in half, then fourths. Then cut each of the fourths into 3.
You will have 12 relatively even rolls.
Space the rolls evenly in the pan.

Let the rolls raise until they grow together or are double in size.

Ta Da! The finished product . . . 

I can almost smell the cinnamon and the yummy bread baking smell as I look at this picture! I often made these for holiday breakfast or on some special day like Father's Day. It was usually a special day. I think any day can be made into a special day with these in the house. What do you think?

Oooooh, aaaaah! Yum!

Coolrise, two day method . . .

Once you get the rolls in the pan cover with waxed paper and put in the refrigerator. The rolls will slightly rise over night. Get them out in the morning (sometimes I do this VERY early, like 3 or 4 AM if I wake up) and allow rolls to finish raising. 

You might have to help them along if you want to eat them before very late morning. The refrigerator slows down the carbon dioxide production of the yeast. You need to warm up the rolls so the yeast wakes up and gets to work. Here's how I do it.

I turn on the oven and preheat it to 200 degrees. Then turn it OFF. Now put the pan of rolls in the warm oven. Leave them for about an hour or until rolls have raised. Remove from the oven. Preheat. Bake.

Here are some other ways the dough can be gently warmed: 
  • Fill the sink with HOT water and put a rack over the top of the sink. Set the pan of rolls above the hot water and drape a towel over to hold in the heat. Replace the water as it cools.
  • Set the pan of rolls in front of a heat register. 
Special thanks to my niece Hannah for helping me make the above batch of Cinnamon Rolls. This was the first, but not the last batch she made.


Scooter is quite content in my kitchen!

Next up . . .

It is now the season when my kitchen goes into full cookie baking mode interrupted only for making batch upon batch of Christmas Caramels. Stay tuned!


Tuesday, September 17, 2013

White Bean And Chicken Soup

As soon as the weather cooled down a bit my mind went to soup. Well, not literally, but I did start to think about soup recipes. Soup and recipes used together is a bit of a stretch for me because usually I just make my own soup. Really, you just need some sort of broth or liquid, some vegetables, maybe some meat or poultry, seasonings, maybe a starch and a bit of creativity. However, I have used a couple of different recipes for white soup or chili and yesterday I used a combination of several and a couple of twists of my own to come up with what I am calling White Bean And Chicken Soup. It isn't thick enough to be considered chili in my mind, but you could make it so. 


White Bean And Chicken Chili

1 lb. boneless skinless chicken breasts, cut into 1/2 inch cubes
1 large onion, diced
1 1/2 tsp. garlic powder
1 Tbsp. olive oil
3 cans (14.5 oz) chicken broth
2 cans Cannelini beans, drained and rinsed
2 cans (4 oz) chopped green chilies
1 1/2 cup corn 
1/2 tsp. salt (optional)
1 1/2 tsp. ground cumin
1/2 tsp. paprika
1 tsp. dried oregano
1/2 tsp. ground coriander
1/4 tsp. black pepper
1/4 tsp. ceyenne pepper
1/2 cup sour cream

Heat oil in a large saucepan over medium heat. Add chicken, onion, and garlic powder to saucepan and cook until chicken is no longer pink. Add broth, beans, green chilies, corn, and seasonings. Bring to a boil, reduce heat and simmer, uncovered, for 30 minutes. Just before serving, stir in sour cream. Yield: 8 servings

Make It Your Own . . .

Your soup doesn't have to be like my soup! If you want it to be thicker, use two cans of chicken broth or even just one. Add in one with the beans and other ingredients, then add one or two more if desired. 

If you want it more spicy, ramp up the ceyenne or add in a splash or two of hot sauce. You could chop up a jalepeno and cook it with the chicken. 

I like to stir in the sour cream, but you might want to put it on the table and use as a garnish instead.

Add a tablespoon or so of fresh lime juice to brighten up the flavor just a bit.

Cannelini beans are the creamiest of the white beans, in my opinion. For a creamier texture put one can of the beans and a bit of the broth in a blender or food processor before adding to the soup. It will make it the soup more creamy and less chunky. You can use any other white bean in the soup but the Cannelini works best if you want to blend some of them. Otherwise, feel free to try white kidney beans, great northern beans, or even garbanzo beans.

You might want to omit the salt and add it later to taste. There is a lot of salt in the chicken broth and you might not need it.

Garnish To Your Heart's Desire . . .

You can serve with corn chips, shredded cheese, sour cream, or salsa. How about adding in a few bits or diced tomatoes, green peppers or diced onion?

And Then . . .

One of the things I have always liked about making soup is the fact that it is usually cook once, eat more often. Soup in almost any form is as good or better the second or third day. Soup reheats easily on the stove or in the microwave. Most kinds of soup freeze well, too, in a freezer bag or a plastic container. 

Enjoy! Soup's on!


Wednesday, July 24, 2013

Website Fascination

Today's post will be short and sweet, but I wanted to let you in on my new favorite recipe source.


After Hannah and I went on our hunt for (and found!) the most delicious Black Bean Burger we were totally ready to find more super duper ways to prepare quinoa. 

You probably already know that quinoa (pronounced keen-wa) is a whole grain rich in vitamins, minerals, and fiber with a decent amount of protein for a grain.  

Hannah found this great site and now you can find it by clicking here http://www.thegardengrazer.com/2013/01/crazy-for-quinoa.html

Recipe #1

I first made the Mexican Quinoa Salad because I like all things remotely Mexican and I had everything on hand. I have since found out that the dressing is also good as a marinade on chicken and I suspect on pork and fish as well. It is the taste of summer, refreshing, delightful and down right yummy! I would even like it on a green salad. 

Back to the quinoa. How can you go wrong with corn, onion, peppers, tomatoes, and black beans? I wanted to eat it just like that then I remembered the whole idea was to try a new way to eat quinoa and let me tell you, it did not disappoint!

Recipe #2

Next I made the Quinoa Vegetable Salad with Lemon-Basil Dressing because I am being overtaken by fresh basil. It is very similar to the Mexican Salad but with garbanzo beans instead of black beans and of course it has a different dressing. As long as I have basil growing this might be my new favorite potluck salad.

Next Plan

I believe before the week is over I will try the burritos as well and maybe my own version of the Pizza Bites. I might even venture past the quinoa collection and into the other recipes on this site. 

No pictures today because I was too busy enjoying the salads, but don't worry, as there are wonderful photos at the garden grazer website. Check it out. 

Last Bit of Advice . . . 

Enjoy as much fresh seasonal produce as you can! The Missouri peaches are fantastic, the cantaloupes make me drool, the Iowa Sweet Corn is perfect, the green beans are growing and producing like weeds, the cucumbers and zucchini and peppers and more are coming on strong and I have heard of people getting their first few tomatoes. All this and so much more is out there begging for some good tasty eating. Don't miss it!