Thursday, September 20, 2012

Kitchen Fun Tonight!

I need a kid friendly dessert for a family event on Sunday. I was in the mood to try something new so I went searching on one of my favorite recipe sites, Allrecipes.com where I found Peanut Butter Sandwich Cookies. What kid wouldn't like that? I'm thinking most adults would like that, too! After all, what's not to like about peanut butter or sandwich cookies? So, putting them together is bound to be a winner. I noticed this recipe has 4 1/2 stars out of 5 and lots of reviews, which I quickly perused and decided this one was worth a try.

My finished cookies! Success!

You, too, can find this recipe by clicking here.  

I made the recipe as written with one change. The recipe as written calls for 1 cup of shortening. I used 1/2 cup shortening and 1/2 cup butter. I'm sure all shortening would have been good, too. 

I used my smallest cookie scoop to make the balls, so they would all be similar in size. Since this is a two cookie serving I wanted the single cookies to be small. 

Dip your fork in sugar to keep it from sticking as you flatten the cookies.

Do not over bake! I baked for 6 1/2 minutes and watched them closely. As soon as they began to turn golden I yanked them out of the oven and let them rest on the hot pans for a couple of minutes as the next pan went into the oven. 

When frosting the cookies, put a dollop in the center of the flat side of one cookie, and top it with another cookie putting the flat sides together and gently pushing them together to spread out the frosting. 

As I was making the sandwiches I thought chocolate frosting would be mighty tasty, so part way through I added 1 tablespoon of baking cocoa to the frosting and made the remainder peanut butter chocolate sandwich cookies. Yum! 

Can you see the two different frosting fillings?
I predict that these cookies will be a hit with kids of all ages! They are flavorful and chewy. I will keep them nice and soft by putting a slice of bread in the plastic container with the cookies. 

Now, lest you think I have jumped head first into a vat of sugar and fat with all my talk about Snicker Salad and Peanut Butter Cookies here's what I ate for supper tonight . . .


Grilled cod and mini peppers with salad. Tasty!

Jeremiah 31: 25 ~ For I have given rest to the weary and joy to the sorrowing.

Wednesday, September 19, 2012

Giant Stuffed Shells

Late this afternoon I joined some great friends for a bit of cooking before we enjoyed dinner delish. Four of us joined forces to create this meal, 12 year old young man, 10 year old lovely young lady who just days ago entered the age of double digits, their ageless mother and me. What a team!

Here's what we created . . .  Giant Stuffed Shells

Here's what you will need . . .


6 oz. giant pasta shells (about 20)
1 pound lean ground beef
1 large onion, chopped (about 1 cup)
1 clove garlic, minced
8 oz. shredded mozzarella cheese (2 cups)
1 egg, slightly beaten
1/2 cup fine dry Italian style or seasoned bread crumbs
1/4 tsp. pepper
1 jar (26-30 oz.) spaghetti sauce
1/4 cup grated Parmesan cheese


Here's what you will do . . .


Preheat oven to 400 degrees.

Cook pasta shells in boiling water according to directions on box. Drain. Rinse in cold water, drain again. Set aside.

Meanwhile, in a large skillet over medium heat, cook the ground beef, onion and garlic until the meat is browned. Remove from heat and drain the fat from the meat. Stir in the mozzarella cheese, beaten egg, bread crumbs and pepper. 

Pour about 3/4 cup of the spaghetti sauce into the bottom of a 9" x 13" baking dish.

Spoon about 3 tablespoons of the meat mixture into each cooked pasta shell. Arrange the stuffed shells over the sauce in the dish. Pour the remaining sauce over the shells. Sprinkle with the Parmesan cheese. 

We squeezed in a few extra shells. They all look so happy nestled in the pan, ready for sauce.

 Loosely cover the baking dish with foil. Bake for 20-25 minutes or until heated through. 

Garnish with fresh parsley if desired. 

Dividing the tasks . . .


The kids are beginning to readily jump in and work. We mentioned grating Parmesan and the young lady leapt right to the task. The young man ran to get the onions and chopped until his eyeballs demanded I take over the job.
He cut the onion in half from top to bottom and peeled the onion.

Lay it flat and cut through, but not all the way to the stem. Cut all the way across in narrow slices. Then turn the onion sideways and cut narrow slices. The onion will fall apart in tiny squares.
We worked on the onions, the garlic and the cheese while ageless Mom got the water boiling and the meat in the skillet. Once the onion and garlic where chopped and minced they cooked with the meat. While the mom cooked the meat the kids and I measured the bread crumbs, beat the eggs, measured the pepper and sauced the baking dishes. Yes, baking dishes. This family of more than the average number of children also had a harvest crew to feed. This was the perfect recipe to multiply and bake two pans at once. 

Now for the SURPRISE!


We had a super duper extra special salad tonight. It is one of those "sometimes" salads, not an every day salad like a lovely green salad. No, this is more treat or dessert than salad, Snicker Salad! The kids jumped right in, chopping snickers bars and cutting apples, and adding it to the pudding and whipped topping mixture. 

Our dinner was made even better by sitting around the table, hearing about school and activities. I enjoy sharing this family time and feel blessed to put my feet under their table.

BTW . . .

This is a great make ahead pasta recipe. Make and stuff the shells, cover with foil and refrigerate till later in the day or even overnight. Since it will be cold when you bake it, you will need to bake 15-20 minutes longer.  Be sure to bake until shells are heated to at least 140 degrees. You can check this with an instant read thermometer.

Leftovers keep well for a few days. Reheat, covered with foil, in the oven or reheat, covered loosely with waxed paper, in the microwave.  

Happy dinner! 


Monday, September 10, 2012

Surprise! Eggplant Is Delish!

One of my many blessings happens to be sharing recipes with my sisters. A few weeks back Pam told me about a great Angel Hair Pasta with Eggplant and Tomatoes recipe. Ok, I thought, I will try it sometime, but honestly it wasn't high on my list. She insisted it was really good, but I remembered the big purple fruits of the eggplant that my Grandpa grew in his garden and brought to my mom. All I can remember is that it was "slimy", but a few days ago an eggplant found its way into my grocery cart anyway. After all, Pam said it would be good and she is pretty much always right about such things.

Today was the day to give it a try so here we go with the recipe, my version of it. 


Angel Hair Pasta with Eggplant and Tomatoes

1 medium eggplant, sliced into 1/3" thick rounds
4 yellow mini peppers
Olive oil cooking spray
1 tsp. olive oil
3/4 tsp. salt, divided
1 clove garlic, minced
1 large fresh tomatoes, cut into large dice
1/4 tsp. crushed red pepper flakes
1/4 tsp. black pepper
2 Tbsp. fresh basil,  minced (or 2 tsp. dried basil)
2 Tbsp. fresh chives, minced (or 2 tsp. dried chives)
1/2 c. chicken broth
8 oz. angel hair pasta, cooked according to package directions
4 oz. feta cheese, crumbled

Preheat grill to medium. Lay eggplant slices in single layer on a cookie sheet. Spray with olive oil cooking spray and sprinkle with 1/2 tsp. of salt, flip and continue with other side. Transfer eggplant slices and whole mini peppers to grill rack. After 2-3 minutes (or when lightly browned) flip over and cook the other side. Cook until eggplant is tender and until peppers soften. Remove from grill. Cut into bite side pieces, discarding pepper seeds and stems. Set aside.

Cook pasta in boiling water according to package directions.

Heat olive oil in a skillet over medium heat. Add garlic and cook until softened, about 1 minute. Do not let garlic burn. Add tomatoes and cook until slightly softened. Add cooked vegetables, remaining 1/4 tsp. salt, remaining seasonings, and chicken broth and cook for a few minutes until broth is slightly reduced. Add cooked pasta and toss to coat. Add cheese just before serving.

Serves 6
Vegetable sauce is done!

Here's what I did . . .


Remembering that a recipe like this one is a guideline, I made a few little changes. When it came to salting the eggplant slices, I simply cranked my grinder a bit on each side of each slice after I lightly sprayed it. I didn't measure the 1/2 teaspoon.

Get all the vegetables cut and ready to go. Measure all the seasonings and the chicken broth. Prep before cooking, so that nothing overcooks while you are prepping.

I didn't have angel hair on hand, but I did have bow tie pasta. That will work! It will be different, but good, all the same. Pasta is pasta. It took less time to cook the sauce than the pasta, so I got the water boiling and the bow ties were cooking before I started cooking the sauce. If you use angel hair, it will cook faster than my pasta. When it is done, drain it. Put it in a bowl and cover it to keep it warm until your sauce is ready.

I didn't have feta either, but I did have a chunk of parmesan, so I grated some of that to use instead. Feta would be really good, so I will try that next time, but the parmesan was delicious, too. Use what you have.

Personally, I like vegetables so I made the full amount of sauce, but only cooked half the amount of pasta. That gave me plenty of pasta and sauce for 3 delicious meals. 

I am already thinking ahead to the next time and the possibility of adding purple onion or maybe adding some fresh spinach at the very end of the cooking time.

I liked the eggplant much more than I expected. It was a happy little surprise and now I want to try more recipes to see just what I have been missing!

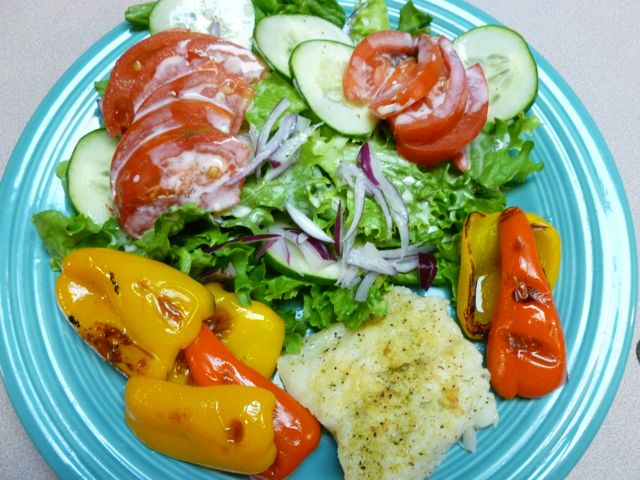
Serve with a salad for a great dinner.


According to the recipe notes, you can roast the vegetables instead of grilling. Preheat oven to 425ºF. Line a baking sheet with foil and give it a spray. Place vegetables on prepared baking sheet and coat with cooking spray; season with 1/2 teaspoon of salt. Roast, until lightly browned, about 20 minutes. Remove from oven and cool to room temperature.

Eggplant, give it a try! You might like it, just like I did. It's never too late to learn something new!


Monday, September 3, 2012

Correction! Salt needed!

An engineer friend noticed that I left out the salt amount on the Red Velvet Cake recipe. Yikes! So, thanks to Dave I have made the necessary correction and added 1 tsp. salt to the ingredient list. I apologize and hope no one made a flat tasting cake. 


One of the neat things about salt is that it enhances the sweetness of the product and intensifies the flavor. It doesn't make baked products taste salty (unless too much is added), but it brings out the sweetness. Cool, huh? If the salt is left out the taste is rather flat and the taster can tell something isn't quite right.